

Weather sealing is the key to stopping air leaks in your home. By sealing gaps around windows and doors, you can reduce energy waste, lower utility bills, and improve indoor comfort. Air infiltration – caused by cracks and pressure differences – forces your HVAC system to work harder, wasting up to 40% of your heating and cooling energy. Weather sealing tackles this problem with simple solutions like caulking, weatherstripping, and compression seals.
Here’s why it matters:
- Save Money: Proper sealing can cut heating and cooling costs by 15%.
- Improve Comfort: Eliminate drafts, reduce noise, and maintain steady indoor temperatures.
- Protect Your Home: Prevent moisture damage, reduce allergens, and stop ice dams in winter.
From DIY steps to advanced materials like vinyl window seals, weather sealing is an easy way to make your home more efficient and durable. Let’s break it down.
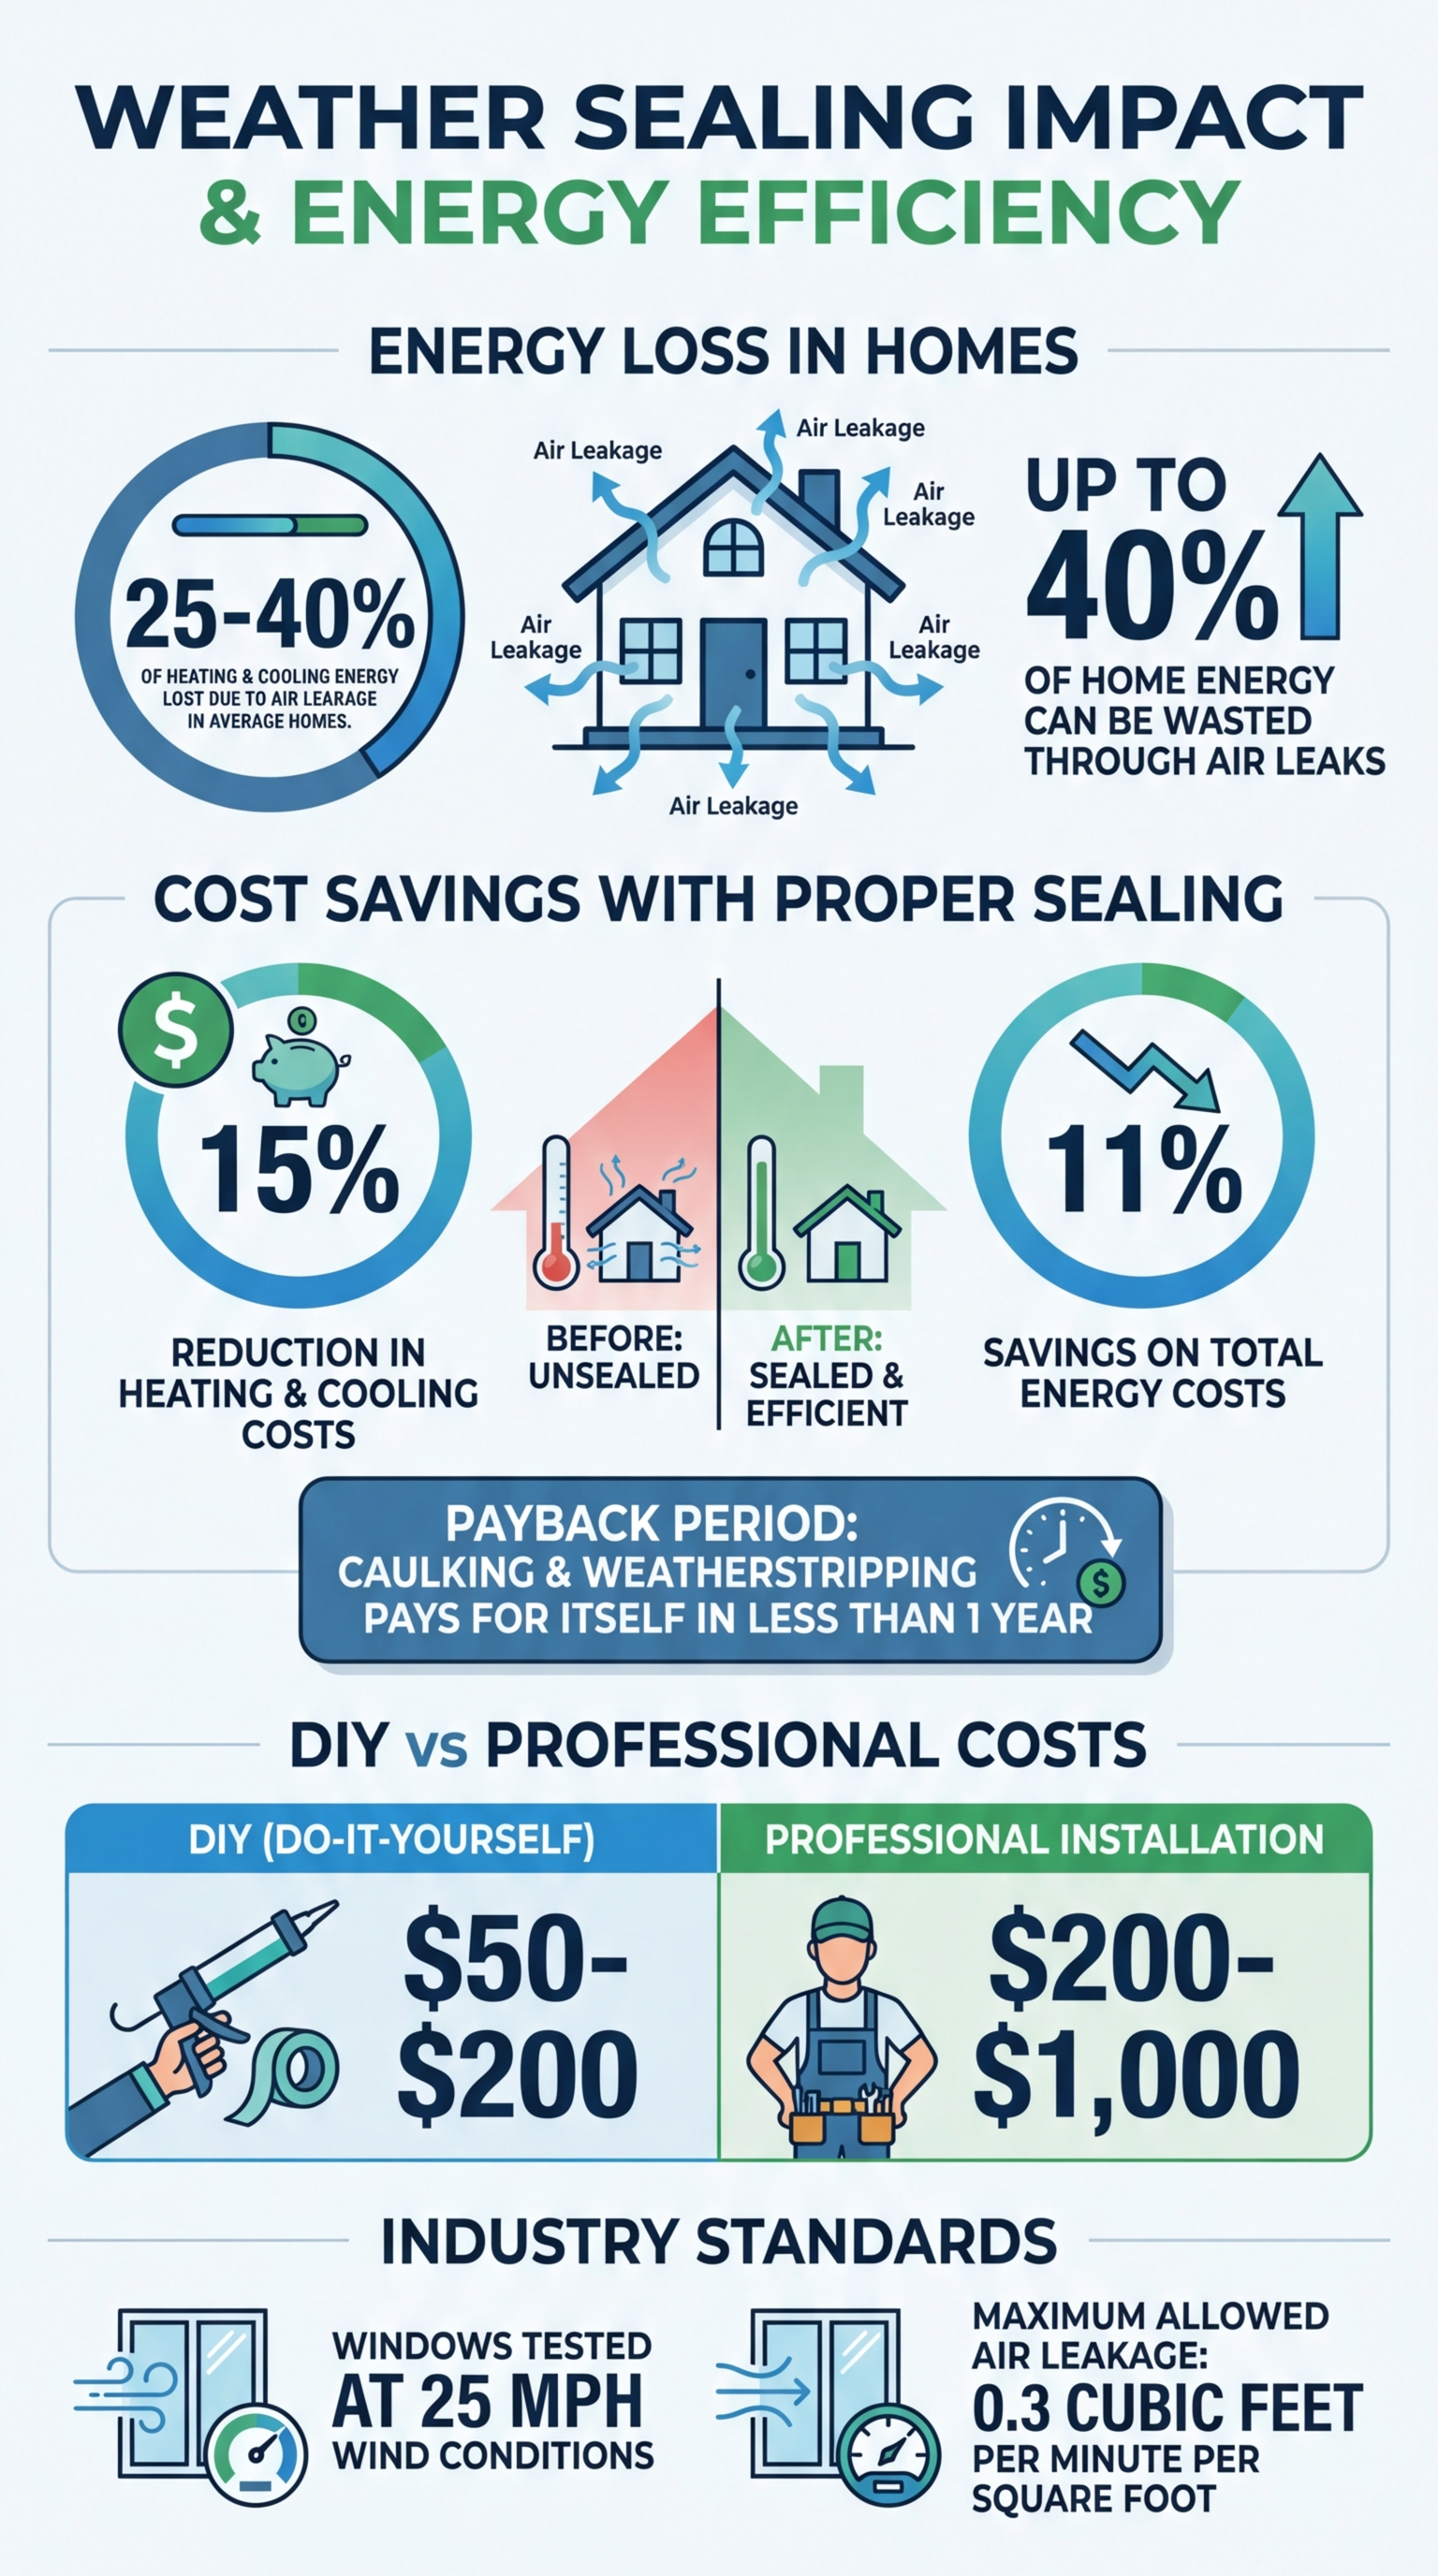
Weather Sealing Energy Savings and Air Infiltration Statistics
What is Air Infiltration and Why Does It Matter?
Air infiltration refers to the unintentional flow of outdoor air into your home through cracks, gaps, and openings. Picture it as invisible leaks in your home’s outer shell – the envelope that separates your cozy indoor environment from the outdoors. Unlike deliberate ventilation, these leaks happen without your control.
This phenomenon occurs due to differences in air pressure between the inside and outside of your home. Wind can push air through small gaps, while household appliances like exhaust fans and clothes dryers create negative pressure, pulling outdoor air inside. Windows are especially prone to this issue. Air can sneak in through cracks between the window frame and wall, along moving sashes, or through gaps caused by aging seals or improper installation.
The Fenestration and Glazing Industry Alliance sheds light on this:
“Every home, regardless of age or location, needs to ‘breathe.’ … This is air infiltration, and it is the result of air pressure differences between the inside and outside of the home”.
To meet industry standards, residential windows are tested under conditions simulating 25 mph winds. They must not allow more than 0.3 cubic feet of air per minute per square foot.
How Air Infiltration Affects Energy Efficiency
Air infiltration can make your HVAC system work much harder than it should. Roughly 25–40% of the energy used for heating and cooling in an average home is lost due to air leakage. The “stack effect” intensifies this problem: warm air rises and escapes through the upper parts of your home, creating a pressure drop that pulls cold outdoor air in through lower-level gaps. As your heating system works to warm this incoming air, energy use – and utility bills – skyrocket. This is why many homeowners also invest in Low-E insulation technology to further minimize heat transfer.
By sealing air leaks and adding energy-efficient glass packages, homeowners can cut heating and cooling costs by about 15% (or roughly 11% of total energy costs). Simple techniques like caulking and weatherstripping often pay for themselves in less than a year.
Signs of Air Infiltration in Your Home
Spotting air leaks early can save you from unnecessary energy expenses. Here are some common warning signs:
- Drafts near windows: Feel a cold or warm breeze when you place your hand near the window frame? That’s a red flag.
- Uneven room temperatures: Notice one room feels much cooler or warmer than the rest of the house? Air leakage might be to blame.
- Dirty spots on surfaces: Over time, air leaks can leave stains on carpets, paint, or insulation.
- Whistling or humming sounds: Windy days might reveal gaps through these telltale noises.
- Ice dams on the roof or eaves: In winter, this could indicate warm air escaping through the top of your home.
- Spider webs: Consistent airflow in areas like basements or near windows can attract spiders to build webs.
For added protection, keep windows closed and locked when not in use. Locking pulls the sashes tighter against the seals, reducing leaks. Also, check for missing or damaged caulk around both the interior trim and exterior window frames. While you’re at it, check your doors also. If you’re having problems with them, you may want to upgrade to a Waudena door. They also have a fiberglass door. They’re a brand we trust and they have a lot of options. Make sure you check the seal all around them. If your door is not even, gaps can cause air to seap into your home.
Catching these issues early can make a big difference. With this understanding, you’re ready to explore how weather sealing can effectively block air infiltration and improve your home’s energy efficiency.
sbb-itb-a4eb837
How Weather Sealing Prevents Air Infiltration
Weather sealing is a straightforward yet effective way to tackle air infiltration by reinforcing your home’s envelope. By filling in gaps and cracks around window frames, weather sealing blocks unwanted airflow and ensures a tighter seal for your home.
When windows are closed, foam or rubber strips compress evenly to form a continuous barrier that meets airtightness standards. However, for this barrier to work as intended, it must remain unbroken across all joints, seams, and penetrations. Even a tiny gap can allow air to pass through due to pressure differences. This is why proper installation and regular upkeep are crucial. Building codes, such as the IECC, set specific airtightness requirements to ensure effectiveness.
Types of Weather Sealing Techniques
There are several methods for sealing windows, each addressing air infiltration in unique ways.
- Compression seals: These rest on the window frame and compress when the window closes, forming a pressure-tight seal. They work especially well for exterior jambs and heads.
- V-strips (tension seals): These flexible, V-shaped strips provide a consistent seal for gaps, adapting to slight movements.
- Magnetic seals: Similar to refrigerator gaskets, these seals are highly effective for creating airtight closures in window channels.
- Interlocking metal channels: Featuring hooked profiles that engage when closed, these seals offer excellent protection in demanding conditions but often require professional installation.
- EPDM gaskets: Cut slightly smaller than the opening, these gaskets create a tight friction fit while allowing for minor adjustments.
For optimal results, a multi-layered approach is often best. Exterior caulking can block wind and water, while interior weather stripping helps prevent air exchange. This layered strategy is especially useful in advanced window systems, such as vinyl windows.
Weather Sealing in Vinyl Windows
Vinyl windows showcase the seamless integration of various weather sealing techniques. These windows utilize high-performance materials like silicone and EPDM, which maintain elasticity in extreme temperatures and resist UV rays and ozone exposure. This durability not only enhances their lifespan but also contributes to energy efficiency.
Companies like Vinyl Windows Co incorporate multi-point compression seals and welded frames to eliminate gaps found in mechanically fastened designs. Precision-welded corners ensure a continuous barrier around the window’s perimeter. Additionally, specialized weather stripping products, such as WRS .270″ x .150″ pile and glazing wedge seals, are designed specifically for vinyl frames to minimize air, wind, and water infiltration while maintaining smooth functionality.
In harsh climates, silicone weatherstripping stands out for its resilience. It compresses gradually without cracking or hardening, ensuring the seal remains effective even after years of exposure to extreme temperature swings. This durability makes it a reliable choice for long-term performance.
Step-by-Step Guide to Weather Sealing Your Windows
Sealing your windows against the elements doesn’t have to be a job for the pros. With some careful prep and attention to detail, you can tackle it yourself. The process can be broken down into three key stages: cleaning and measuring, installing the materials, and testing the seal. Following these steps will help keep drafts out and energy costs down, even in extreme weather. Start with a clean, well-measured surface to get the best results.
Step 1: Cleaning and Measuring
Begin by removing any old weatherstripping. If it’s nailed or stapled, use a pry bar or flat-head screwdriver to pull it off. For adhesive residue, a rag dipped in mineral spirits works well to loosen stubborn spots. Once the old material is gone, clean the window frame thoroughly with a mix of mild detergent and water. Follow up with rubbing alcohol or a non-oily degreaser to remove any lingering grime.
“A smooth, clean surface is the difference between ‘sealed for years’ and ‘peels off next season.'”
– Rachel Baxter, Window Hardware Direct
Make sure the surface is completely dry before moving on – moisture or dust can compromise the adhesive. Next, measure the perimeter of each window sash and frame with a tape measure. Add about 10% to your total to account for overlaps and minor errors. If you’re replacing old weatherstripping, bring a piece of the original to the store to match the size and thickness. Keep in mind that weatherstripping adheres best when temperatures are above 20°F (-7°C).
Step 2: Installing Weather Sealing Materials
Cut your weatherstripping material to the lengths you measured earlier. For adhesive-backed strips, peel off the backing and press the strip firmly onto the frame. Work slowly to avoid stretching the material, as this can lead to shrinkage and gaps later.
If you’re using non-adhesive options like felt or certain vinyl strips, secure them with finishing nails or a staple gun. Space the fasteners 3 to 4 inches apart to keep the material in place without affecting the window’s operation. For V-strips on sliding windows, make sure the “V” opens toward the interior to create the right tension when the window closes. A roller can help press adhesive strips firmly into place, ensuring they stick along the entire length.
Step 3: Testing and Adjusting for Airtight Seals
Close the window to check that the weatherstripping compresses evenly and doesn’t make it hard to latch. If the fit is too tight, switch to a thinner material.
To test for drafts, try a smoke test, shine a flashlight around the edges at night, or use an infrared thermometer to spot cold areas. If you find leaks, adjust the weatherstripping or add removable caulk to reinforce the seal.
“Weather stripping shouldn’t interfere with the operation of the window or door. Find a thickness that compresses tightly between the gap when the door or window is closed and allows easy operation.”
– Glass Doctor
Benefits of Weather Sealing in Extreme Climates
Weather sealing does more than just block air infiltration – it’s a game-changer for homes in extreme climates. Whether you’re dealing with frigid winters or scorching summers, weather sealing helps maintain a comfortable indoor environment while boosting HVAC efficiency.
Energy Savings and Lower Utility Bills
Did you know air leaks can waste up to 40% of your home’s energy? According to the EPA, sealing air leaks and adding insulation can cut heating and cooling costs by an average of 15%, which translates to about 11% savings on total energy expenses. In regions with extreme temperatures, these savings can be even more pronounced, offering a rapid return on investment.
By keeping conditioned air inside and unconditioned air out, weather sealing reduces the workload on your HVAC system, extending its lifespan and improving efficiency. Simple measures like caulking and weatherstripping often pay for themselves in less than a year.
“Air leakage control is the single most important retrofit activity, and it should be considered first in any upgrade strategy for your house.”
– Natural Resources Canada
Beyond cutting energy costs, these upgrades also make your home more comfortable and resilient.
Improved Home Comfort and Durability
Weather sealing ensures consistent indoor temperatures, eliminating hot and cold spots throughout your home. This not only reduces the need for constant thermostat adjustments but also protects your home’s structure. By keeping moisture out, it prevents issues like mold growth and wood rot, which can lead to expensive repairs. In snowy areas, weather sealing also stops warm air from escaping to the roof deck, helping to prevent ice dams.
Another bonus? It keeps out outdoor pollutants, allergens, and dust, improving indoor air quality. Plus, it reduces noise from the outside, making your home a quieter, more peaceful space.
“Effective sealing prevents rainwater from penetrating the structure, thus reducing the risk of mold growth, wood rot, and other types of water damage.”
– Window Hardware Direct
Companies like Vinyl Windows Co offer advanced weather-sealed windows specifically designed for extreme climates. These features highlight why weather sealing is essential for both comfort and long-term home durability.
Conclusion
Weather sealing does more than just block drafts – it plays a key role in cutting energy costs, preventing moisture damage, and keeping indoor temperatures steady throughout the year.
These practical benefits also come with clear financial perks. Whether you decide to handle weather sealing as a DIY project, costing anywhere from $50 to $200, or hire a professional for $200 to $1,000, the return on investment is undeniable. It eases the workload on your HVAC system, extends its lifespan, and provides savings that go well beyond the upfront expense.
“Weather sealing is a simple yet effective way to enhance your home’s comfort and efficiency.”
– Window Hardware Direct
To keep these benefits intact, regular upkeep is crucial. Annual inspections – or twice a year if you live in extreme climates – help ensure seals stay in good shape. Additionally, choosing the right materials for your specific needs is key: silicone works well in high-temperature areas, V-seals are ideal for sliding windows, and adhesive foam is great for filling uneven gaps.
For those aiming to take energy efficiency to the next level, Vinyl Windows Co offers high-performance vinyl windows featuring advanced weather sealing. With precision-welded frames and cutting-edge sealing technology, their windows deliver exceptional energy efficiency and long-lasting protection – all backed by a lifetime warranty.
FAQs
What are the fastest ways to find air leaks around my windows?
To spot air leaks fast, start with a visual inspection of your home, both inside and out. On the exterior, focus on areas where different materials meet, like siding, brick, and foundations. Pay special attention to exterior corners and spots around outdoor water faucets. Inside, check window frames, weather stripping, electrical outlets, switch plates, and gaps where pipes or wires pass through walls. Using caulking and weather stripping not only seals leaks but can also highlight potential problem areas during your inspection.
Which weather sealing material works best in very hot or very cold climates?
Vinyl weatherstripping works well because it stands up to moisture and handles extreme temperatures with ease. Meanwhile, durable metals like bronze, copper, stainless steel, and aluminum are great options for sealing air leaks around windows and doors. These materials not only last a long time but are also budget-friendly.
When should I replace weatherstripping instead of just adding caulk?
To ensure doors and operable windows seal properly, replace the weatherstripping when needed. Weatherstripping is designed to flex and compress, making it ideal for areas with movement. In contrast, caulk works best for stationary gaps and cracks, as it can’t withstand motion. If the weatherstripping becomes brittle, damaged, or fails to seal tightly, it’s time for a replacement – caulk simply isn’t suited to handle the friction or movement of these parts.


